The Best YouTube Tech Tips, Tricks and Equipment You Need to Know NOW with DIY Video Guy Caleb Wojcik: Beauty and the Vlog Podcast 106
“Know what you’re getting yourself into.”
Are you wondering what would be the best YouTube equipment to use when starting a YouTube channel? Or, are you someone who’s looking to upgrade your work and give your videos a new look using different tools and technology? Whether you’re just beginning to set foot in the YouTube world or you’ve already been vlogging for some time, today’s episode will surely provide you with a tremendous amount of great information.
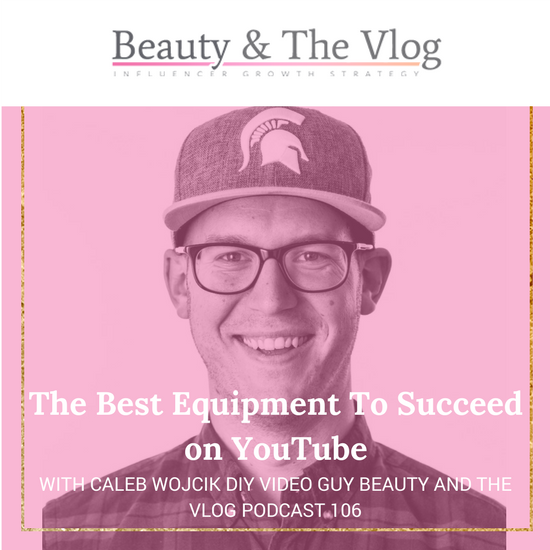
In this episode, we’re going to hear from expert videographer, Caleb Wojcik, about the best YouTube equipment when it comes to making videos. He’ll also answer some of the most frequently asked questions by vloggers and YouTubers and share some practical tips and tricks about lighting, camera settings, and more.
“Quality can definitely set you apart.”
After getting his first DSLR camera, Caleb started making videos and slowly taught himself how to make better videos and how to edit them. After some time, he finally decided to start teaching others the skills he taught himself. He now runs a video production company in San Diego, teaches solo video production on his website, and he is the teacher of multiple courses on filming & editing video.
“The more you educate yourself in the technology side of things, the better.”
Caleb has been making videos off and on for nearly a decade now. In that time, he has filmed the National Hockey League, Major League Baseball, NCAA basketball & football, weddings, commercials, book trailers, and plenty of training videos for the web. So, if you’re looking for an expert to teach you about the best YouTube equipment, he’s exactly who you’re looking for!
6 Key Interview Takeaways
- You don’t need a nice camera to make a video. According to Caleb, the biggest hiccup for online influencers and content creators is they think they need a certain piece of equipment to make a video. However, that’s not necessarily true anymore. You can start with what’s already built into your device.
- There are three parts of the tripod that video quality relies on — the camera and lens, the lighting, and the audio. Most people think that they should invest a lot of money on a really good camera. But really, you should know what you’re getting yourself into and put equal parts into your camera and lens, your lighting, and then your audio.
- Just go ahead and start. Not all successful YouTubers started out with high-quality videos right from the very beginning. If you go back to some of their videos, you’ll see they’re not high quality. So, just start with what you have and make your way up.
- Get a better web cam and microphone than whatever your computer has. This is the most basic, entry-level upgrade you can make.
- Windows are a great source of lighting. The bigger the light source, the less shadows it casts and the more natural it makes you look, which is very important for something like beauty videos.
- Upgrade your lighting and audio before you upgrade your camera. Getting an upgrade on a new camera will typically not make your videos that much different versus getting better lights and learning how to use them or having better audio that will really make a difference right away.
Check Out All The Best YouTube Equipment Mentioned in The Podcast!
-
Logitech HD Pro Webcam C920: This web cam is a good way to get started with HD quality video and it allows you to record directly into your computer.
- Pros:
- Built-in dual stereo mics with automatic noise reduction
- Automatic low-light correction
- Tripod-ready universal clip fits laptops, LCD or monitors
- Pros:
-
Blue Yeti USB Microphone: This microphone allows you to have a little mobile video recording station that you can place in front of a window or an interesting backdrop so you can get started without buying a DSLR, tripod, or any other equipment.
- Pros:
- It connects via a USB port so it can plug right into your computer
- 3 condenser capsules can record almost any situation
- It has four different settings so it will work for a variety of different video types
- Pros:
-
Audio-Technica ATR2100 Microphone: This microphone allows you the same flexibility for your recording space as the Blue Yeti but at a lower cost.
- Pros:
- It connects via a USB port so it can plug right into your computer
- Built-in headphone jack allows you to hear yourself in real-time
- It reduces the amount of sound picked up from the sides and back of the microphone
- Pros:
-
Rode VMPR VideoMic Pro: If you’re a beauty vlogger, you’re pretty close to the camera because you’re focused on your face, eye lashes, or something very close, so you can get away with an on-camera microphone like this one.
- Pros:
- Ultra lightweight; making it great if you travel or film in various locations
- Connects directly to the iPhone TRRS microphone/headphone jack
- It reduces the amount of sound picked up from the sides and back of the microphone
- Pros:
-
Rode smartLav+ Lavalier Microphone: Lavaliers are great when you need to be a little further from the camera. So, if you are going to use a DSLR or a mirrorless video camera to film, and you need to be several feet away, using a lavalier microphone is usually the better option. Since this one plugs right into a phone you would just sync the audio and video after recording.
- Pros:
- Compatible with iOS devices and select Android devices
- Very small and lightweight; making it great if you travel or film in various locations
- Includes a foam pop shield to minimize wind noise and vocal plosives
- Pros:
-
Canon EOS 70D Digital SLR Camera (Body Only) and the Canon EOS 80D Digital SLR Camera (Body Only): These cameras are great if you’re ready to really step up your game and invest in some higher quality equipment.
- Pros:
- The screen can flip back towards you so you can see that you’re framed properly, you’re in focus, and that the camera is recording
- They have great auto-focus
- They include a jack for a microphone to plug directly into the camera
- Pros:
-
Canon EF 40mm f/2.8 STM Lens for Canon DSLR Cameras: This is a good all-around “pancake lens” for the Canon 70D or 80D.
- Pros:
- Small and lightweight; making it great if you travel or film in various locations
- It has great auto-focusing capabilities
- Since it’s a “pancake lens” it doesn’t stick out away from the camera and will help you be more discreet if you don’t want to draw attention to yourself while filming in public
- Pros:
-
Heil PR-40 Dynamic Microphone: Much like the Blue Yeti and ATR-2100 mentioned above, this microphone will allow you flexibility for your recording space and improved audio quality.
- Pros:
- The body is made of steel and is very durable
- It produces the widest frequency range available in a dynamic microphone
- This microphone has an XLR cord which means it can be used with a mixer allowing you to have more control of your audio settings
- Pros:
-
Canon PowerShot G7 X Mark II: This camera is a great beginning camera for those not yet ready to invest in the higher-end Canons mentioned above.
- Pros:
- Point and Shoot capability makes it easy to get a great shot
- The lens is already built-in so you do not need to purchase one separately
- It has a 3″ LCD touchscreen display
- Pros:
-
Sony DSC-RX100 Digital Camera: This camera is a great beginning camera for those not yet ready to invest in the higher-end Canons mentioned above.
- Pros:
- Point and Shoot capability makes it easy to get a great shot
- The lens is already built-in so you do not need to purchase one separately
- It includes a Steady-Shot image stabilization feature
- Pros:
Caleb Wojcik’s Best YouTube Equipment Tips and Tricks
Should I use ring lights?
Ring lights are great when you’re only lighting your face for a make-up tutorial. If you step back or you’re trying to light a room, they aren’t quite not powerful enough.
What’s the deal with softboxes vs umbrella lights?
- Softboxes can create that airbrush effect for fashion and beauty videos, however, you might get shiny parts of your skin where it’s really light.
- Umbrellas can limit the shininess that you might get on your skin. You can bounce the light off of an open umbrella onto the inside or bounce the light off a wall or a ceiling.
- Softboxes are great because you just point them at yourself and they’ll work.
- Umbrella lights are easier to set up and tear down. But you have to play around with them to get the right effect.
What is the trick for making that crisp look for these YouTube videos?
The biggest thing is just making sure your camera is exposing properly. No matter what you have lighting-wise, you don’t want your camera to be overexposed and have things that are too white and too bright and blown out, or too dark so you can’t really tell what’s happening.
It’s finding whatever you can do lighting-wise first and then looking at the camera and adjusting it manually or putting it in a mode that will make sure you look okay.
What’s a tip for recording on a sunny day?
Don’t record a video in auto white balance. If it’s a sunny day and then the clouds go in front of the sun, not only will it get darker but the white balance will change. The image will get cooler-looking. When the sun comes back out, it will get warmer looking.
How can I soften shadows and make myself less shiny?
The biggest thing is having the light be soft and having it have a big source. So, if you have a really strong light and it’s casting shadows on you, or it’s making your head or face shiny, then shoot the light through a shower curtain or a bed sheet or something soft and white that can make the light source bigger. That will make the shadows soften and make you less shiny.
What’s the trick to lighting a room?
Bounce lights off of walls. Instead of pointing a light right at your background to cause a bunch of shadows, point the light up at the ceiling. That just raises the light in the room like it would be if you had lights on.
How can I best shoot a beauty video?
The normal kind of beauty look that most fashion is shot through is a huge light behind and above the camera. There’s a really good definition on your chin and it also kind of slims the face on both sides if there’s not lights coming from the sides.
If you want it to be a little more dramatic, you can have lights to the side and have one a little bit more powerful than the other. It’s really just a matter of playing around with it in whatever setup you’re in.
What features should I look for in a camera?
The features that you’re really looking for is good auto focus. Another one is to have a screen that can flip back towards you so that you can see if you’re framed properly, in focus, and that the camera is definitely recording. Also, look for one that you can plug a microphone directly into.
Should I invest in lenses?
Invest in whatever lens you need for the type of video you’re doing. But there are multiple tiers of price levels for lenses. It really depends on what your budget is. It doesn’t make sense to buy a lens if you don’t know why you’re buying that exact one.
What are some tips for somebody who’s wanting to dive into learning about manual mode for their cameras?
There are three main parts of shooting in manual.
- Aperture: determines how much is going to be in focus. When you’re watching a video and the person is in focus but the background is kind of blurred out, that means they set the aperture to do that.
- Shutter speed: once you set it, you typically don’t change it.
- ISO: determines your camera’s sensitivity to light. If the ISO is low, that means the camera is not very sensitive to light, which means your image will be darker. If you raise it really high, you’re kind of adding electronic power to the camera so that it can basically see in the dark.
How can I achieve a blurred background?
There are a few ways to accomplish having a blurred background. One of them is just being further away from it and focusing on yourself. If you’re in a bigger room, then just the fact that you’re further away will help blur the background. Another would be changing the aperture to a number — an F4, F3.5, F2.8, or something lower. However, you might need to get a better lens to achieve that.
What is a good beginner software that you would recommend for people that are just getting started with editing?
On the free side of things, on a Mac, there’s iMovie. You can also get it on an iPhone or an iPad just to get started in editing that way.
On the Windows side of things, there’s Windows Moviemaker.
If you’re going to do recordings from your web cam, or maybe you want to record your screen also, Camtasia is a good option on Windows and ScreenFlow on Mac.
To get more advanced, you can look at Adobe Premiere Pro or Final Cut Pro X on the Mac. Those are paid options.
How can I avoid a grainy quality to my videos?
When you’re outside, you can put the ISO pretty low. You can drop it down to the 100-200 range. It’s when you’re inside and you don’t have as much light that you need to typically bump it up to 400 or 800 or higher.
How can I get quality sound on a budget?
It’s really about proximity. You don’t need to spend too much money on a good microphone. If it’s close to you, you have a room where there’s not much other sound and maybe you put things in the room to help with echo, like putting pillows in places, closing the blinds, or hanging a blanket somewhere if need be, those types of thing also help.
How can I reduce the wind sound when filming outside?
You need something between the microphone and the wind that’s hitting it to absorb it. You can put a wind screen or something they call a ‘dead cat’ on your microphone.
What’s your biggest tip for online influencers?
Whatever equipment you have now, just get started with it and go from there. Don’t limit what you could do just because you feel like you didn’t have enough equipment. It’s only a part of it. It’s not the most important part by far. You need to focus on what’s in the video just as much as the technical piece to end up having something that’s helpful for people.
Resources
Caleb Wojcik’s Courses (Enter BEAUTYVLOG for 10% off!)
Connect with Caleb Wojcik
Facebook Group:
SaveSave
SaveSave
SaveSave
Author: Erika Vieira
Marketing and sales expert Erika Vieira is the host and producer of the #1 influencer strategy podcast, The YouTube Power Hour. The podcast, with over 100 episodes and hundreds of thousands of downloads is dedicated to content creators who are looking to start, improve and grow their unique influence online. Erika works with influencers on personal branding, content improvement and defining a niche via customized strategy sessions, channel critiques and business support. She also loves makeup, beauty and her family and believes anyone who has the drive and passion can find success online. Feel free to send her a message here.
